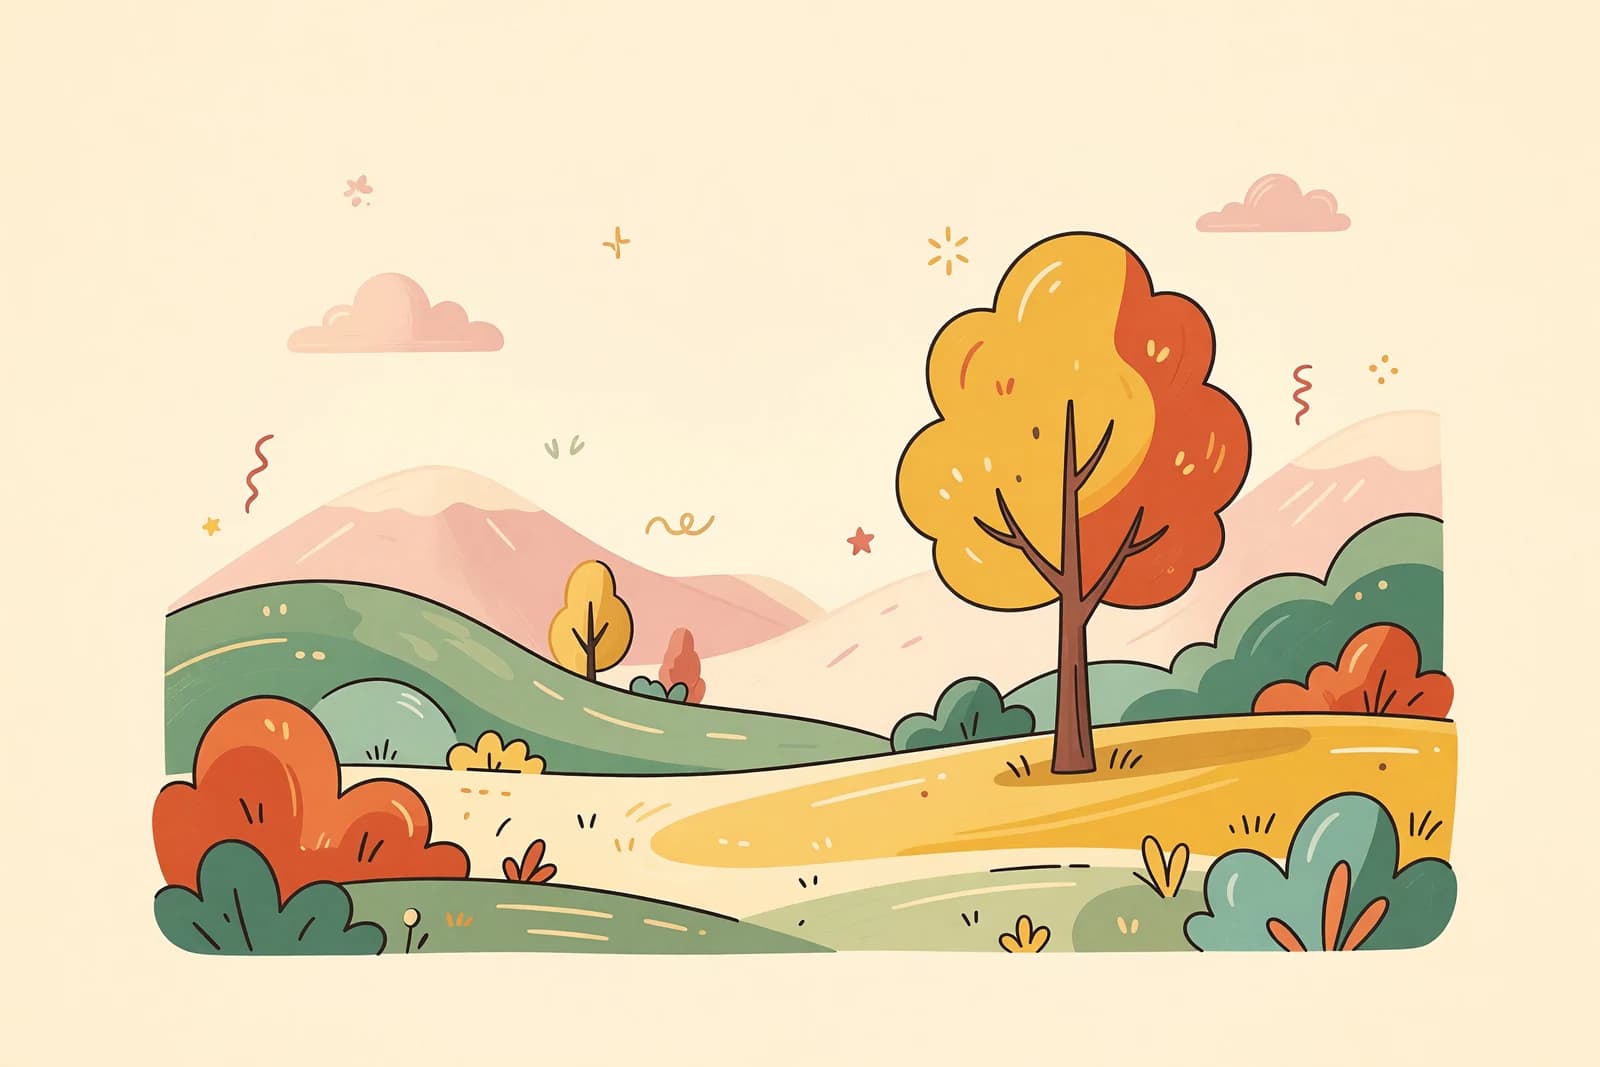
Learn how to draw a landscape the easy way, starting from one horizon line and simple shapes. A beginner-friendly scenery drawing guide, no experience needed.
A wide-open landscape can look like a lot to draw, but it all starts with one quiet line across your page. In this guide you'll learn how to draw a landscape one easy step at a time, building from a horizon line out to hills, trees, and a winding path. No experience needed, and no fancy supplies. If you can draw a straight-ish line, you can draw a whole scene.
We'll keep every mark light at first so mistakes are easy to fix, then darken the lines you love at the end. This easy landscape drawing works for mountains, fields, or a calm little valley. Grab a pencil and let's begin.
What you'll need
- A pencil (a soft 2B is nice, but any pencil works)
- An eraser
- Plain paper
- Optional: a black pen for outlining, plus crayons, markers, or colored pencils
How to draw a landscape step by step
This is the foundation-first method most teachers use: place your horizon line, block in the big shapes, then add small details last. Art teacher Tom McPherson of Circle Line Art School walks beginners through this same order, starting a landscape with a soft horizontal line across the page as the horizon before anything else goes down. We'll do the same.
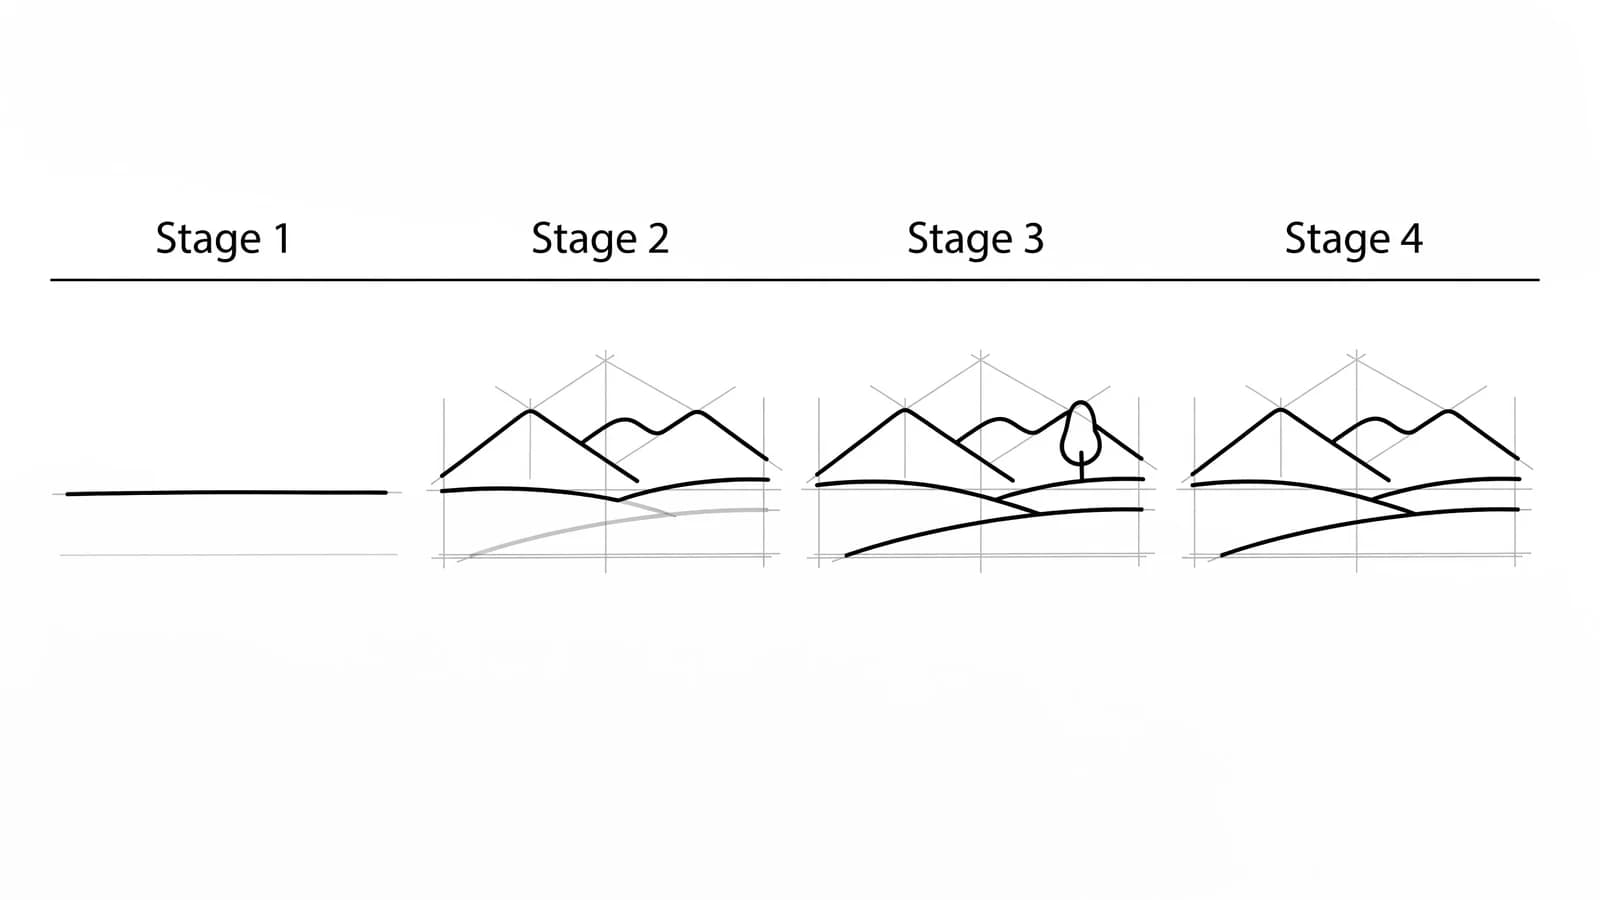
Step 1: Draw the horizon line
Draw one light, mostly straight line across your page. This is your horizon, the place where the land meets the sky. Put it a little above the middle for more ground, or a little below the middle for more sky. Everything below this line is your land, and everything above it is your sky.
Step 2: Block in the background
Along the horizon, draw the far-away shapes. A row of soft, low mountain humps or a line of gentle hills works great. Keep these simple and small. They sit far in the distance, so they don't need any detail yet. Just a wavy edge is enough.
Step 3: Add the midground
Now fill the space between the mountains and the front of your scene. This is your midground. Add a few rounded tree shapes, a smaller hill, or a field. Make these a bit bigger than the background shapes, because they are closer to you. Things that are nearer always look larger.
Step 4: Build the foreground with a path
The bottom of your page is the foreground, the part closest to you. Draw a winding path or a river that starts wide at the bottom and gets narrower as it travels back toward the horizon. This shrinking trick is what makes your scene feel deep, like you could walk right into it.
Step 5: Add a few foreground details
Place one or two bigger shapes up front, like a large tree, a rock, or some grass. These are the closest things, so they should be the biggest and have the most detail. A tree here can show a few branches and a clump of leaves, while the far trees stay as plain blobs.
Step 6: Shade for depth
Here's the magic step. Keep the faraway mountains pale and soft, then make each layer a little darker as it comes toward you. McPherson teaches beginners to shade distant hills with pale, soft tones, then make the tones a little darker as forms come forward. Use the side of your pencil for smooth, light shading.
Step 7: Darken your lines and clean up
Go over the lines you want to keep with a firmer stroke or a black pen. Erase any leftover guide lines. Add a few small touches, like birds in the sky (two little curves) or a cloud or two. Your landscape suddenly looks finished.
Step 8: Color it in
Color the sky from light at the horizon to deeper blue at the top. Make far hills a soft, hazy blue-green, and bring in warmer, brighter greens as you come forward. This simple scenery drawing really pops once color shows how far each layer sits.
What artists recommend (and common mistakes)
The biggest idea behind every good landscape is to draw what you actually see, not what you think a hill or tree should look like. As art educator Betty Edwards puts it in Drawing on the Right Side of the Brain, "Drawing is not really very difficult. Seeing is the problem, or, to be more specific, shifting to a particular way of seeing." Here is what that looks like in practice:
- Place the horizon first. Following Circle Line Art School, set your horizon line and big masses before any small objects. A common beginner mistake is starting with tiny details, like a single tree, and running out of room for the whole scene. The horizon keeps everything in order.
- Make the distance lighter. Far things should be pale, soft, and simple, while near things are darker and sharper. This is called atmospheric perspective, and skipping it is why some drawings look flat. Lighter and softer means farther away.
- Pick a small section instead of everything. Landscape educator Orla Stevens tells beginners to pick one section of the landscape and just look for the lights and the darks in it, so you don't get overwhelmed by the whole view.
- Mass your leaves, don't outline them. Pen-and-ink instructor Claudia Nice shows that drawing every single leaf is the classic mistake. Instead, sketch a loose blobby shape of foliage and let leaf shapes appear only at the edges. Trees are clumps, not piles of separate leaves.
- Start simple. As illustrator Andrew Loomis wrote in Fun With a Pencil, "Every form is like some simpler form, with this or that variation, and with pieces added on." A plain hill-and-path scene built from a few easy shapes now beats a frustrating mountain range later.
Fun variations to try
- Sunset scene: Lower your horizon, fill the sky with warm orange and pink stripes, and add a round sun sinking behind the hills.
- Mountain lake: Add still water in the foreground and lightly mirror the mountains upside down below the shoreline for a reflection.
- Country road: Make your winding path a dirt road with a little fence, a barn, and a few round trees along the way.
- Four seasons: Draw the same simple scene four times and color it spring green, summer gold, fall orange, and winter white.
Frequently asked questions
How do you draw a landscape for beginners? Start with one horizon line across your page, then add far mountains, midground trees, and a foreground path that narrows as it goes back. Keep distant shapes pale and simple, and save details for the front. Building in layers from back to front is the easiest method.
What is the easiest landscape to draw? A field with a winding path and a few rolling hills is the simplest. There are no straight buildings or tricky angles, just soft curves and one horizon line, so it is very forgiving for a first try.
How do you make a landscape look like it has depth? Use atmospheric perspective: make far things lighter, softer, and smaller, and make near things darker, sharper, and bigger. A path or river that narrows toward the horizon also pulls the eye back and adds depth fast.
Keep drawing and coloring
Now that you can draw a landscape, fill it with life. Learn how to draw a tree for your foreground or how to draw a flower to scatter across the field. Need more ideas? Browse aesthetic drawing ideas, or print our free nature coloring pages to color scenery, trees, and more. You've got this.